Monday, July 25, 2011

Classic Camping Recipe: Monkey Bread

photo: Annie Shapiro

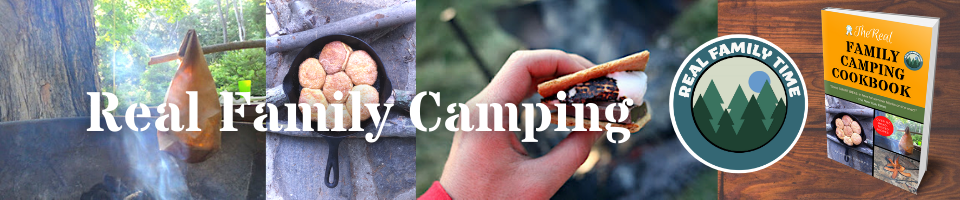
Monkey Bread is one of those camping foods that starts with a tube of Pillsbury dough. So I use the term "recipe" loosely. Still, it's a classic and the kids love it, and so do I! It's delicious!

Why is Monkey Bread called Monkey Bread? Many of us campers think it's because the kids rip the "loaf" apart as if they were little monkeys. Hard to think of any other reason, isn't it? And only the Boy Scouts know for sure.

Have fun, and remember the butter!  


Monkey Bread

Serves: 4-6

Ingredients:
1 tube of refrigerated biscuit dough
½ c. of brown sugar
1 T. of cinnamon
1 large Ziploc bag
butter

Preparation: 
1.  Grease a skillet or Dutch Oven with butter.
2.  Let the kids mix the sugar and cinnamon together in a plastic bag.
3.  Have the kids pull biscuits off the roll and shake each biscuit in the bag of cinnamon sugar.
4.  Place the biscuits in the skillet or Dutch Oven.
5.  Dot each biscuit with butter.
6.  Cover and cook the bread over medium heat for 20-30 minutes.  If you cook this in a Dutch Oven, pile hot coals on top with your camp shovel.


“Once in a young lifetime one should be allowed to have as much sweetness as one can possibly want and hold.”
- Judith Olney


You might also like our recipe for Paper Bag Eggs. More than 350,000 other campers did...


Sunday, July 24, 2011

Classic Camping Recipe (and Vegan, too): >>Veggie-Potato Foil Packets


photo: Annie Shapiro


Veggie-Potato Foil Packets

We make these every time we go camping to get a veggie or two into the kids along with all the biscuits, S'Mores and whatnot. Kids like to assemble the packets (which we usually do at home, then label with a sharpie) and then watch over them in the fire.

Serves:  4

Ingredients:
4 small potatoes, chopped
2 carrots, peeled and sliced
1 cup of string beans with the ends snapped off
any other kind of veggies you like
olive oil
herbs - I only pack a few when we're camping, like basil & oregano
salt & pepper

Preparation:
1. Tear off 4 rectangles of aluminum foil and fold them in half to make double thick squares.
2. Let the kids assemble their own packets with the potatoes, carrots and string beans. 
3. Drizzle olive oil over the veggies. Season with herbs, salt & pepper.
4. Wrap up the foil packets so the contents are snugly wrapped, but not too tight.    
5. Place the packets directly on medium coals or on the hot part of the grill.
6. Turn them every 5 minutes or so, and cook them for about 20 minutes, or until everything is cooked through.  
7. Serve with salt & pepper


TIP:
•  When making this for a group, put everything in a large aluminum pan and cover it with foil. (Or use a Dutch Oven.) Cook it on a hot grill or in the coals for about 45 minutes, stirring every 5 or 10 minutes.

“Potatoes served at breakfast, At dinner served again; Potatoes served at supper, Forever and Amen!” - Pennsylvania prayer


Thursday, July 21, 2011

Eggs in a Baggie! A Classic Camping Recipe

We always make Eggs in a Baggie on camping trips. Even our kid who doesn't like eggs likes to make Eggs in a Baggie for someone else. That's because it's FUN! After you crack a couple of eggs into a Ziploc-style bag (we use the cheap kind) you get to squish them around to scramble 'em up:

Squishing.


After the eggs are thoroughly squished, you pop the baggie into a pot of boiling water (as usual, we had the wrong size bag, so we had to hold it there. With a smaller bag you can just toss it in):

Simmering.


Then, after 3 or 4 minutes of simmering, you just slide the cooked eggs out out of the bag and onto your plate. Voila! Eggs in a Baggie! Or should I say, Eggs a la Bag.


I suppose Eggs in a Baggie are like coddled eggs in that they're both cooked in closed containers in simmering water.  But Eggs in a Baggie have a unique texture - airy and a little bit cake-like. They slip miraculously from the bag when they're done without any butter - but go ahead and add a pat to give it a little oomph. We also add crumbled, cooked bacon, and any leftover, cooked potatoes or veggies from the night before. Waste not, want not (as my mother would say).

Have fun! And here's the official recipe, from The Real Family Camping Cookbook:

Boiled Scrambled Eggs AKA Eggs in a Baggie

Serves: 2

Ingredients:
4 eggs
2 strips of bacon
butter
salt & pepper, hot sauce and catsup
2 plastic Ziploc baggies – the large sandwich bag size

Preparation:
1.  Bring a large pot of water to a boil.
2.  Fry the bacon in a skillet.
3.  Let each kid tear apart or crumble their bacon into a Ziploc bag.
4.  Add a shake each of salt & pepper.
5.  Break1 or  2 eggs into each bag and zipper it tightly.
6.  Let the kids squish the eggs around until they’re scrambled.
7.  Open a corner of the bag and squeeze out all of the air so the bags don’t explode when you cook them. I learned this the hard way.
8.  Put the zipped bags of eggs into a pot of boiling water and cook them until they’re done, about 3 or 4 minutes.
9.  Empty the omelets out of their bags onto plates.
10. Serve with salt & pepper, hot sauce and catsup.

Variations:
•  Instead of bacon, use cubes of ham or cooked breakfast sausages (or leftover dinner sausages).
•  Add cheese.
•  Add chopped onions, mushrooms and green or red peppers.  
•  Serve on a tortilla.  
•  Garnish with sour cream and salsa or chopped tomato.


“We plan, we toil, we suffer - in the hope of what?  A camel-load of idol’s eyes?  The title deeds of Radio City?  The empire of Asia?  A trip to the moon?  No, no, no, no.  Simply to wake just in time to smell coffee and bacon and eggs.” - J.B. Priestly

Monday, July 18, 2011

Vegetarian "Meatball" Wedges

Yummy.
Friends and readers regularly ask me for vegetarian recipes, so on our camping trip this past weekend  I substituted vegetarian "meatless" meatballs for the real thing in my meatball wedge recipe. 

The vegetarian version was a big hit - the kids ate them all up.  But first they asked, "What kind of meatballs are these?"  "Pork," I said.

Vegetarian Meatball Wedges


Serves: 4

Ingredients:
16 frozen vegetarian meatballs – I used Trader Joe's meatless meatballs.


1 jar of spaghetti sauce
4 hamburger rolls – you can use hero rolls, but I never remember to buy them.
½ lb. of Mozzarella cheese or vegan cheese
salt & pepper

Preparation:
1.  Empty the jar of spaghetti sauce into a skillet and bring it to a simmer.
2.  Add the meatballs and return to a simmer.
3.  Place two slices of Mozzarella cheese on each roll and grill the roll until the cheese melts.
4.  When the meatballs are heated through, spoon 4 meatballs with sauce onto each roll.  
5.  Serve with extra sauce for dipping.

P.S. Vegetarian "meat" keeps well, making it an ideal camping food.

 “Miracles are like meatballs, because nobody can exactly agree on what they are made of, where they come from, or how often they should appear.”  - Lemony Snicket


Monday, July 11, 2011

Vegan Fried Rice Noodles


I love rice noodles because you don't have to boil them - they cook in a bowl of hot water! So it's that much easier at the campsite.

Serves: 4

Ingredients:
8 oz. rice vermicelli (can be found in the Asian section of the supermarket)
1 T. oil, we only bring olive oil when we camp
1 small head of broccolli, cut into small florets and peeled stems cut into sticks (about 2 cups)
1/2 lb. carrots, cut into sticks (about 2 1/2 cups)
1 clove garlic,  minced
3/4 c. vegetable broth
3 T. soy sauce
1 t. sugar
2 scallions (green onions) thinly sliced (1/2 c.)

Directions:
1.  Soak the noodles in a bowl of hot water for 5-10 minutes until al dente, then drain.
2.  Saute the garlic in the oil being careful not to burn it. 
3. Add the veggies and saute for about a minute.
4.  Mix in the broth, soy sauce and sugar and simmer 2 or 3 minutes.
5.  Add the noodles and simmer another 3 minutes.
6.  Top with the sliced scallions.
7.  Yum!

Tuesday, July 5, 2011

The #1 Most Important Car Camping Gadget


The Hide-A-Key. You'll thank me!


For families who leave behind the conveniences of home and plan adventures that take them off into the wilderness, there are any number of essential gadgets for light travel and scout-like resourcefulness. However, if—like us—you stuff your car with  oversized pots, pans, foam mattresses and seltzer makers, there is one gadget that you may want to consider...

A Leatherman? A headlamp? GPS? Nope. The most important car camping gadget you’ll ever own is a little doohickey called ... a Hide-A-Key. That might sound ridiculous, but trust me, if you ever lose your car keys when you’re camping, you will be so happy you bought this little gadget you may even send me flowers. (Roses are nice.)

So What Is It?
There are many different types and brand names for Hide-A-Keys (they are actually called keyholders, Hide-A-Key is one brand) - but they are all the same thing. A Hide-A-Key is a little box with a strong magnet on one side. You put a spare car key in it and stick it to the underside of your car. It costs about two dollars. That’s right, two bucks. And you can buy it at any hardware store.

Why Do I Need One?
I’m sure that you would never lose your car keys. Me neither! But consider this: Pete once went camping in Joshua Tree – a National Park in the middle of the Southern California desert – and in a total fluke accident the end of his ignition key broke off. He had to hitchhike to the nearest town and get the nice people in the hardware store to create a new key from the pieces! You don’t want to go through anything like that, do you? Me neither!

Where Do I Put It?
Every car is different, but pick a place close to the muffler, so you’ll remember where to find it. Reach under and find a nice, flat place to stick it on the chassis. That’s all.

Are They All The Same?
Pretty much, but if you have an oversized key, you’ll need an oversized Hide-A-Key, so bring your key with you to the hardware store to get the perfect fit.

Have fun camping, and I hope you don’t lose your keys! But if you do, and you have a Hide-A-Key (and I really hope you do), I’ll be right here waiting for my flowers. (Lilies are also nice.)


You may also like: 
Tablecloth weights: who knew?


Wordless Wednesday: Fairy House


Built by two 4 year olds.

Friday, July 1, 2011

A Colonial Recipe for July 4th: Apple Pancakes


In honor of Independence Day, here is a recipe for Apple Pancakes from The Cook's and Confectionary's Dictionary: or, The Accomplish'd Housewife's Companion, by John Nott, published in 1726. 


We make apple pancakes all the time, but they are nothing like these. Maybe we need to add more cream and powdered sugar to ours! In case you had trouble reading the original above, here it is in a modern font below. The exclamations [!] are mine.

63. To Make Apple Pancakes.
Pare your apples, cut them in round Slices, fry them in fresh Butter, beat up twenty [!] eggs in a Quart of Cream [!]; put in Ginger, Nutmeg, and Cinnamon beaten, of each two Drams, powdered Sugar six Ounces; pour the Batter on them, fry them, sprinkle them with Rose-water [!], and dust them with Sugar.

Does that not sound delicious? Let me go get my drams of spices and rosewater!

This fascinating cookbook is arranged alphabetically (it is called a dictionary, after all), which makes planning an entire Colonial meal quite a challenge! But it is so interesting and easy to understand that it makes a great read for cooks or historians.

Best of all, it's free! Get it here: The Cook's and Confectionary's Dictionary: or, The Accomplish'd Housewife's Companion .  Click "Get it Now" or "Read Now" on the right.

Have a great 4th, everybody!